RV Waste Tank Venting: Why It’s Important and How to Do It Right

You’re enjoying a peaceful morning in your RV, sipping coffee while surrounded by nature. Then, out of nowhere, an awful sewage smell fills the air. You check the toilet, the sinks, even the waste tanks for RV—but the odor won’t go away.
This isn’t just a minor inconvenience. Poor waste tank venting can lead to persistent odors, slow drainage, and costly plumbing repairs. A properly vented system keeps your waste tanks for RV functioning efficiently by removing sewer gases, preventing pressure buildup, and ensuring smooth water flow.
This guide dives deep into how waste tanks for RV venting works, common problems, and step-by-step solutions. Whether you’re a full-time RVer or a weekend camper, these practical tips will help you maintain an odor-free and efficient waste management system.
How RV Waste Tank Venting Works
RV waste tank venting allows air to flow in and out of the system, preventing negative pressure and ensuring wastewater drains properly.
Why Venting Matters
A well-functioning vent system:
- Prevents odors by directing sewer gases outside.
- Keeps drainage smooth by balancing air pressure in the pipes.
- Protects waste tanks from pressure buildup that can cause cracks or leaks.
Black Tank vs. Gray Tank Venting
- Black Tank: Holds human waste and toilet paper. It produces strong sewer gases that require effective ventilation.
- Gray Tank: Collects water from sinks and showers. It also needs ventilation to prevent slow drainage and musty odors.
Without proper venting, waste tanks for recreational vehicles become breeding grounds for foul smells and drainage issues.
Common RV Waste Tank Venting Problems
Even well-maintained venting systems can develop problems. Here’s what to look out for:
1. Persistent Sewer Odors in the RV
- Causes:
- Blocked or damaged roof vent pipes trap gases inside.
- Dry P-traps let odors escape from drains.
- Loose or missing vent caps allow odors to seep back into the RV.
- Solution:
- Inspect roof vents for blockages. Remove debris, nests, or dirt.
- Pour a cup of water into dry P-traps to restore the seal.
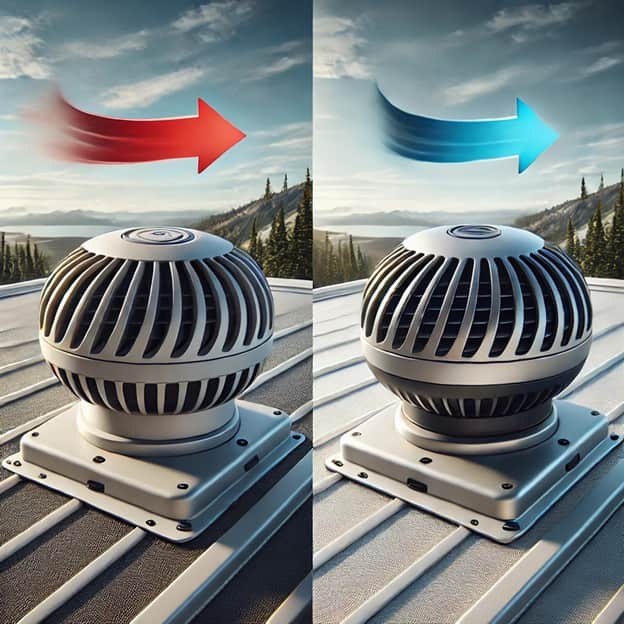
- Replace broken or missing vent caps with high-flow 360-degree vent caps, which improve airflow.
2. Slow Drainage and Gurgling Sounds
- Causes:
- A blocked or undersized vent pipe prevents proper air pressure balance.
- Overfilled waste tanks cause backpressure, slowing drainage.
- Solution:
- Check vent pipes for clogs. Shine a flashlight into the vent and remove obstructions with a ¼-inch to ½-inch diameter plumber’s snake (preferably a flexible, coiled metal type designed for small pipes).
- If your gray or black tank is near full, empty it and see if drainage improves.
3. Waste Tank Overflows or Leaks
- Causes:
- A clogged vent prevents air from escaping, causing the tank to pressurize.
- Cracked or disconnected vent pipes leak waste fumes and moisture.
- Solution:
- Inspect the vent system for cracks or disconnections. Use a smoke test—blow a small amount of non-toxic smoke (available in plumbing smoke testers) into the vent to reveal leaks.
- If you find a leak, seal pipe joints with flexible PVC cement or self-fusing silicone tape.
Step-by-Step Guide to Fixing RV Waste Tank Vent Issues
Step 1: Locate and Inspect Your RV’s Vent System
- Roof vents are usually above the bathroom or kitchen. Check for cracks, debris, or loose fittings.
- If you smell sewage near an indoor vent, check under sinks for an air admittance valve (AAV)—a one-way vent that may need replacement.
Step 2: Clear Blockages from the Vent Pipe
- Manual Removal: If debris is visible at the top, remove it by hand or with long tweezers.
- Plumber’s Snake: Feed a ¼-inch or ½-inch auger-style snake into the vent. Slowly turn the handle to break up blockages.
- Water Flush: Insert a garden hose into the vent pipe and run water through at medium pressure. Avoid high-pressure sprays, which may damage plumbing.
Step 3: Deep Clean the Vent Pipe
- Pour one gallon of warm water mixed with a half cup of baking soda down the vent to break down grease and soap scum.
- If grease buildup is severe, use a biodegradable enzyme cleaner labeled safe for RV plumbing.
Step 4: Test Airflow and Make Adjustments
- Pour a small amount of water into a sink and listen for gurgling—this indicates air is struggling to escape.
- Run water in all sinks and flush the toilet. If drainage is still slow, recheck for clogs.
- If venting problems persist, consider upgrading to a 360-degree rotating vent cap for better airflow.
Step 5: Upgrade Your Venting System
If your RV still has venting problems, installing a mechanical vent fan or AAV can improve performance. These vents allow fresh air in while preventing odors from escaping.
Preventive Maintenance & Best Practices
1. Perform Regular Vent Inspections
- Check vents for debris every three months.
- Before long trips, inspect vent caps to ensure they are secure.
2. Keep P-Traps Full
- If your RV sits unused, pour a cup of water into each drain to prevent sewer gases from escaping.
- Add a drop of RV-safe drain treatment to keep pipes clean.
3. Avoid Common Mistakes
- Never seal a vent pipe. Vents must remain open for proper air exchange. Sealing them can lead to pressure buildup, slow drainage, and even potential leaks.
- Don’t use household drain cleaners. Stick to enzyme-based RV tank cleaners, as harsh chemicals can damage waste tanks for RV.
- Avoid using bleach in waste tanks. Bleach can degrade rubber seals and gaskets, leading to leaks. It can also produce harmful fumes when mixed with other chemicals.
4. Upgrade Your Venting System for Better Performance
- Install a 360-degree rotating vent cap for improved airflow.
- Use a high-flow AAV if your RV lacks proper venting.
- Consider adding a solar-powered vent fan to help pull odors out faster.
By staying on top of maintenance and making a few upgrades, you can keep your waste tanks for recreational vehicles running smoothly and odor-free.
Conclusion & Key Takeaways
Proper RV waste tank venting isn’t just about avoiding bad smells—it’s about keeping your plumbing system working efficiently. By understanding how venting works and following maintenance best practices, you can prevent common issues like slow drainage, tank overflows, and unpleasant odors.
Key Takeaways:
- Venting allows sewer gases to escape and prevents drainage issues.
- Blocked or damaged vents cause odors, slow drainage, and leaks.
- Regular inspections and cleaning prevent costly plumbing problems.
- Upgrades like high-flow vent caps and AAVs improve performance.
Check your waste tanks for RV today. A few small fixes now can save you from major plumbing headaches on your next trip.